Benable — create shareable lists of things you recommend!
E.g., products you love, local businesses, travel recs - you can add anything to a Benable list!

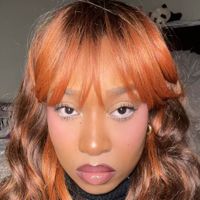
Blue Orchid Makeup - Fairy Makeup Look
 19
items
19
items This was a fun, colorful, artsy look! I was inspired by a flower I saw on Pinterest! Here's what I used and the tutorial videos for how I did it!
Sections
4
Tutorial Videos
Eyes
Face
Lips
Tutorial Videos
Here are the videos I made showing some of the processes of creating this look! I really got to have some fun with colors!
Here’s the video for how I painted my flower! I used multiple colors and even mixed some to get the shades I wanted.
Painting the Flower

Let’s finish this face!! I wanted a base that was fairly minimal, but gave off a bit of a fairy vibe!
The Fairy Base Tutorial
We went with something simple, so that it wouldn’t distract from the overall look! It’s cute and gets the job done!
A Simple, Cute Lippie!
Eyes
Most of the painting was focused on the eye area. I started with sketching my flower and then spent time adding in color.
I used the color "Fascinating." It's a white eyeliner, and I used it to sketch out the outline for my flower.
Eye Kohl | Matte Eye Pencil
I used multiple colors from the Colorfix line to do my eyes and my flower! The colors I used are "Sundaze, Oasis, Joy, Matcha, and Primary Blue." I did mix a few colors amongst themselves and with another product, "Clown White" by Mehron Makeup.
Colorfix Eye, Cheek & Lip Cream Pigment - Danessa Myricks Beauty
I've had this paint for a while! It did great and blended well with the other pigments.
Clown White - Mehron Makeup
This is one of the best mascaras I’ve used! And as a plus, it’s clean! It sends my lashes sky high and I love that the formula is dark.
Limitless Lash Mascara - Best Clean Lengthening ...
I love the Colorfix line! It’s great for creating unique, colorful makeup looks! The color I used “Oasis.” It’s a beautiful bright blue!
Colorfix Eye, Cheek & Lip Cream Pigment - Danessa Myricks Beauty
Face
I used a fairly minimal amount of product on my base. I wanted to keep things pretty skin-like and let the blush shine through. And then I added some flair and played around with glitter setting products.
The color I used is "Bronzelite." I basically used it as a primer and I love blending it with my foundation. It thins it out and can make it glowier!
Strobe Cream | Illuminating Moisturizer + Liquid Highlighter
The shade that I used is "NC 50." This foundation is ultra matte! And it does show texture, so I would suggest mixing it with a glowy primer or a glow booster, so that if you choose to set it with powder so your makeup won't look dried out.
Studio Fix Fluid SPF 15 Foundation | 67 Soft Matte Shades
The shade of the case I used "Deep." I typically use the contour shades, but this time I used a contour shade and two of the blush shades: the dark orange and the dark pink."
Made By Mitchell Curve Case - Deep at BEAUTY BAY
The shade that I use is "Toasted Almond." I didn't use a whole lot because I wanted my base to look fairly natural, and I just wanted some brightness under my eyes. This concealer is an ole' faithful. I love the finish and how it blends out.
#FauxFilter Luminous Matte Buildable Coverage Crease Proof Concealer
This is one of my favorite setting powders! I used it to set underneath my eyes and then to set the rest of my face. It's not a matte powder and it helps preserve the glow of a makeup look!
Light Reflecting™ Setting Powder - Pressed - NARS Cosmetics
The shade I used is "Ube Birthday Cake." It's a light purple, but it looks almost pinkish on my skin tone and undertone. I used it to set underneath my eyes, and I love having that cute, pinkish tint.
Easy Bake Loose Baking & Setting Powder - HUDA BEAUTY
The color that I used is “Bronze Mahogany.” I used it to deepen the contouring I did and warm my face up a bit more. It’s a no hassle bronzer and blends well.
PAT McGRATH LABS Skin Fetish: Divine Powder Bronzer
I used the translucent glitter setting powder. I knew I wanted a glittery fairy finish so I really packed this on! It’s such a fun way to spice up a makeup look.
The Butterfly Effect by Desi - Translucent Glitter Setting Powder
And to top it all off; a glittery setting spray! I love the little extra upmh it gives the makeup look, just to make the base a little more eye-catching. One size matte setting sprays will set your slay all day!
On 'Til Dawn Glitter Waterproof Setting Spray - ONE/SIZE by Patrick ...
Lips
For the lips, we kept it super simple with just a lip liner and gloss. I didn’t want the lips to be the center of attention.
The color I used is “Chestnut.” I think this color is a must have for anyone who has a medium deep - deep skin tone! It can be used for nude lip looks and to tone down a bright lipstick!
MAC Lip Pencil
The color that I used is “Bunny Tongue.” It’s a dark pink. We know SACHEU for their lip stayns, but their glosses are great too! They’re soft and comfy on the lips.
Lip Elixir - Nourishing Lip Glaze